
A shattered car window due to vandalism, theft, or an accidental impact can be quite an unwelcome shock. You’ll definitely want to address this issue promptly to keep your vehicle both dry and secure. While filing an insurance claim might seem like the easiest route, repairing it yourself could save you money, especially if your deductible is high. If you’ve got some basic repair skills under your belt, tackling this job yourself could be both quicker and more cost-effective than waiting for an appointment at a glass or body shop. All you’ll need are a few simple tools and a few hours of your time. Toyota Parts Center offers same-day shipping for door window glass on many Toyota models.
---
### Tools You’ll Need
- Screwdrivers
- A trim tool kit
- Ratchet and socket set
- Mechanics gloves
---
### Replacing the Window Glass
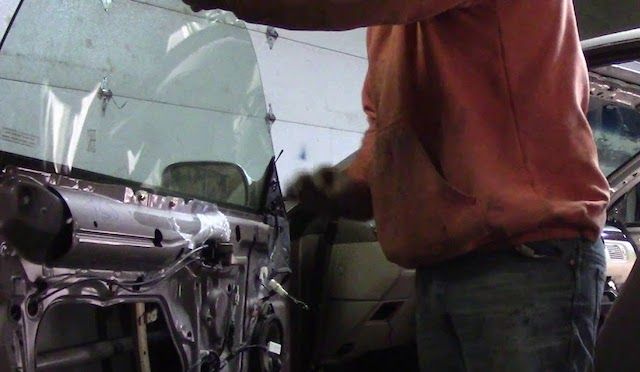
*Image Credit: ZacksWorkshop*
Before you start, it’s a good idea to use a shop vacuum to clean out any broken glass fragments from the interior of your car. Car windows are made of safety glass, which shatters into tiny pieces by design. There’s a good chance some of these shards have scattered throughout your vehicle, so make sure to vacuum thoroughly to avoid any surprises later.
---
### Removing the Inside Door Trim Panel
I recommend checking online for detailed instructions specific to your Toyota model. These steps are tailored for the Toyota Highlander, but keep in mind that different models might have unique fasteners, some of which may be hidden. Knowing exactly where all the screws and clips are located beforehand is crucial to avoid damage during removal.
To begin, you might need to take apart other components like the side mirror trim cover, door handle linkage, door lock switch, and window switches to gain access to the trim panel. Depending on your vehicle, it can take significant effort to pull the trim panel loose and release the retaining clips. If necessary, use a plastic trim tool to assist with the process. With practice, though, this step usually takes around 10 minutes.
---
### Removing the Plastic Vapor Barrier
Behind the trim panel, you’ll typically find a thin plastic vapor barrier designed to prevent moisture from seeping into the vehicle. This layer is often held in place with strong adhesive or tape and must be carefully removed to access the window attachment points. Start at one corner and gently peel it back, avoiding tears. A flat plastic trim tool can help ease the process without damaging the surrounding area.
---
### Removing the Old Window Glass
Once the trim panel and vapor barrier are out of the way, you’ll need to detach the old window glass. First, remove the door speaker if necessary and reconnect the window switch. Adjust the window regulator to expose the window glass attachment bolts. Unscrew these bolts from the sash clips and clean up any leftover broken glass from the window regulator and channels. Finally, vacuum out any remaining fragments from the interior of the door. Leaving shards of glass inside could lead to rust over time, so don’t skip this step!
---
### Installing the New Window Glass
Most new window glasses come with pre-installed sash clips, though some might require transferring the existing ones. Double-check what’s required for your particular vehicle. Carefully tilt the new glass into the door window channels and slide it down until it locks into the window regulator. Reattach the bolts to the sash clips—be mindful not to overtighten.
On certain vehicles, you may need to remove the rear vertical guide channel to fit the new glass properly. One fastener is usually hidden beneath a trim seal near the top of the door above the channel, while the other becomes accessible after removing the interior trim panel. After installation, test the window regulator to confirm proper alignment before moving forward.
---
### Reinstalling the Door Trim Panel
Put everything back together in reverse order. When reinstalling the vapor barrier, ensure it aligns correctly with the holes for the door hardware and seals tightly. Before securing the trim panel, double-check that all retaining clips are in place on the backside. Use all the original fasteners and covers to finish the job.
---
### Important Tips
- Always wear gloves when handling glass to protect yourself from cuts.
- Watch out for sharp metal edges while working inside the door.
- Take photos as you go to reference later if needed.
- Keep track of small parts and fasteners to avoid confusion during reassembly.
- Consider checking and replacing weatherstrips while you’re already working on the door.
---
### Trust Olathe Toyota Parts Center
When it comes to replacing critical components like window glass, quality matters. Using only OEM parts ensures optimal fit, functionality, and visibility. At Olathe Toyota, we offer:
- A wide selection of door window glass and other parts for your Toyota vehicle.
- All OEM parts are covered by the standard Toyota 12-month, unlimited-mileage warranty.
Have questions? Feel free to reach out—we’re here to help!
---
While this guide provides a general overview, always refer to your vehicle’s manual or consult a professional mechanic if you encounter unexpected challenges. Happy repairing!
Diesel Engine Camshaft,Crankshaft Diesel Engine,Diesel Engine Crankshaft,Oem Motorcycle Camshaft
Taizhou Hongxiang Power Machinery Co.,Ltd , https://www.hxcamshaft.com